
Chapter 4.5
The Check Register and Printing Checks
How to write checks during the week, print them together on check paper in one run, and follow every check from written to printed to cleared.
When you finish this chapter you will be able to:
- Write a check to be printed later, without choosing its number.
- Charge a check line to a project, and keep notes with the check.
- Read the Check Register: to print, outstanding, cleared, by hand.
- Print the waiting checks in one run, on the right paper layout.
- Test the alignment before wasting check stock.
Contents
Write checks to print
Write each check as in Chapter 3.1; steps 1 to 3 below are what differ for a check you will print, and the first two need the account to be set up for printing. If the form says "This account is not set up for printing checks: a check on it is written by hand", click Set it up and fill in the bank's name and address, the routing and account numbers and the next check number (Summit's Operating Checking: First Interstate Bank, next check 2254).
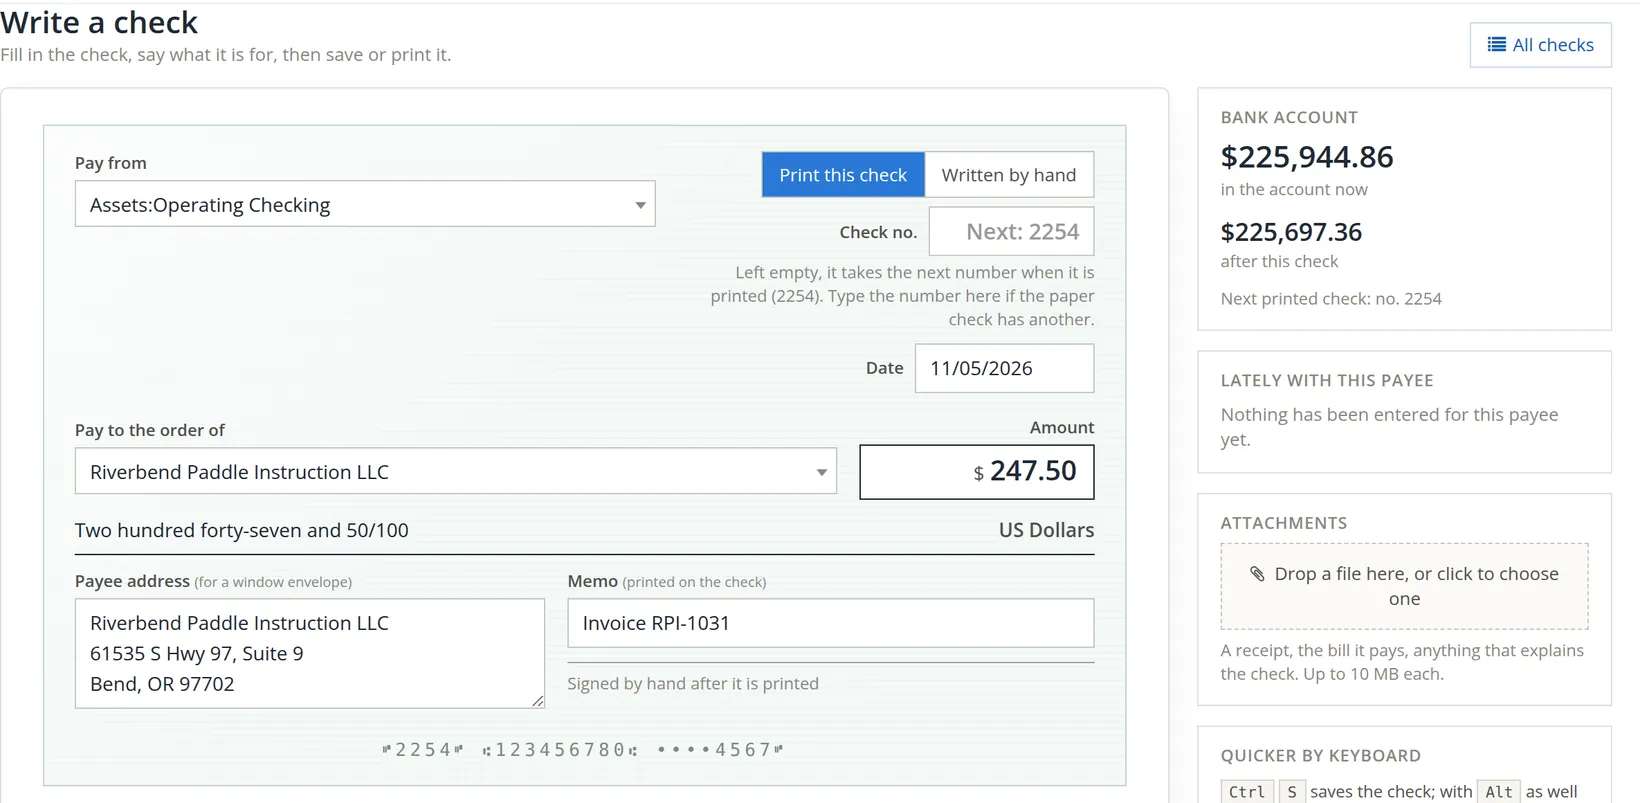
- 1
Leave Print this check chosen 1
On an account set up for printing the form starts on this choice. Choose Written by hand only for a check already written out from a checkbook.
- 2
Leave the check number empty 2
"Left empty, it takes the next number when it is printed." That way the numbers follow the order the checks come out of the printer, and a spoiled check never leaves a gap you cannot explain. The bank panel shows the next number 3.
- 3
Check the payee address 4
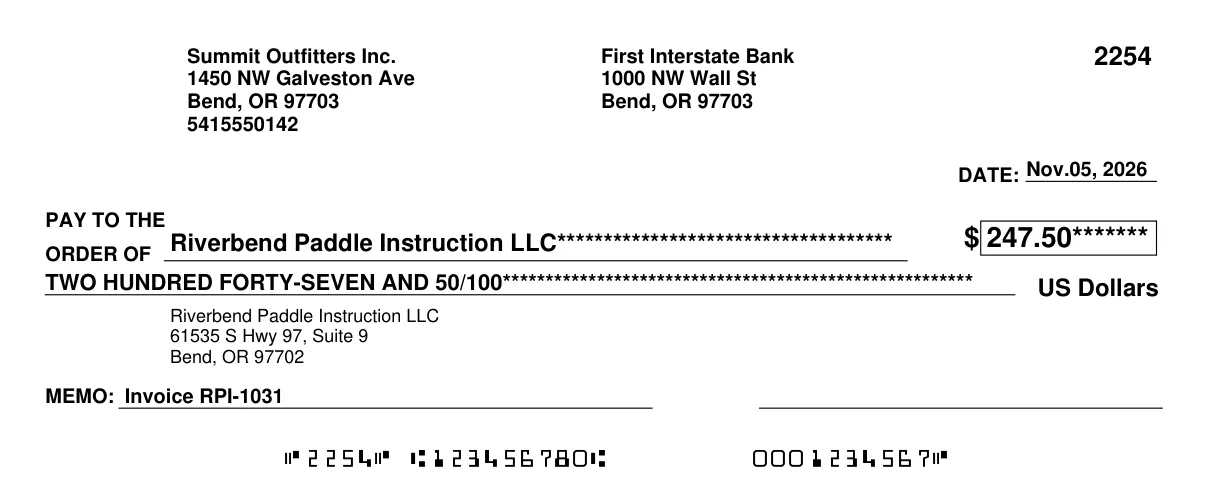
It is filled in from the payee's contact details (the mailing address, if the contact keeps one apart, otherwise the street address). It prints under the amount in words, where the window of a standard check envelope shows it, so correct it here if the payee has moved.
- 4
Say what the check is for, and for which project
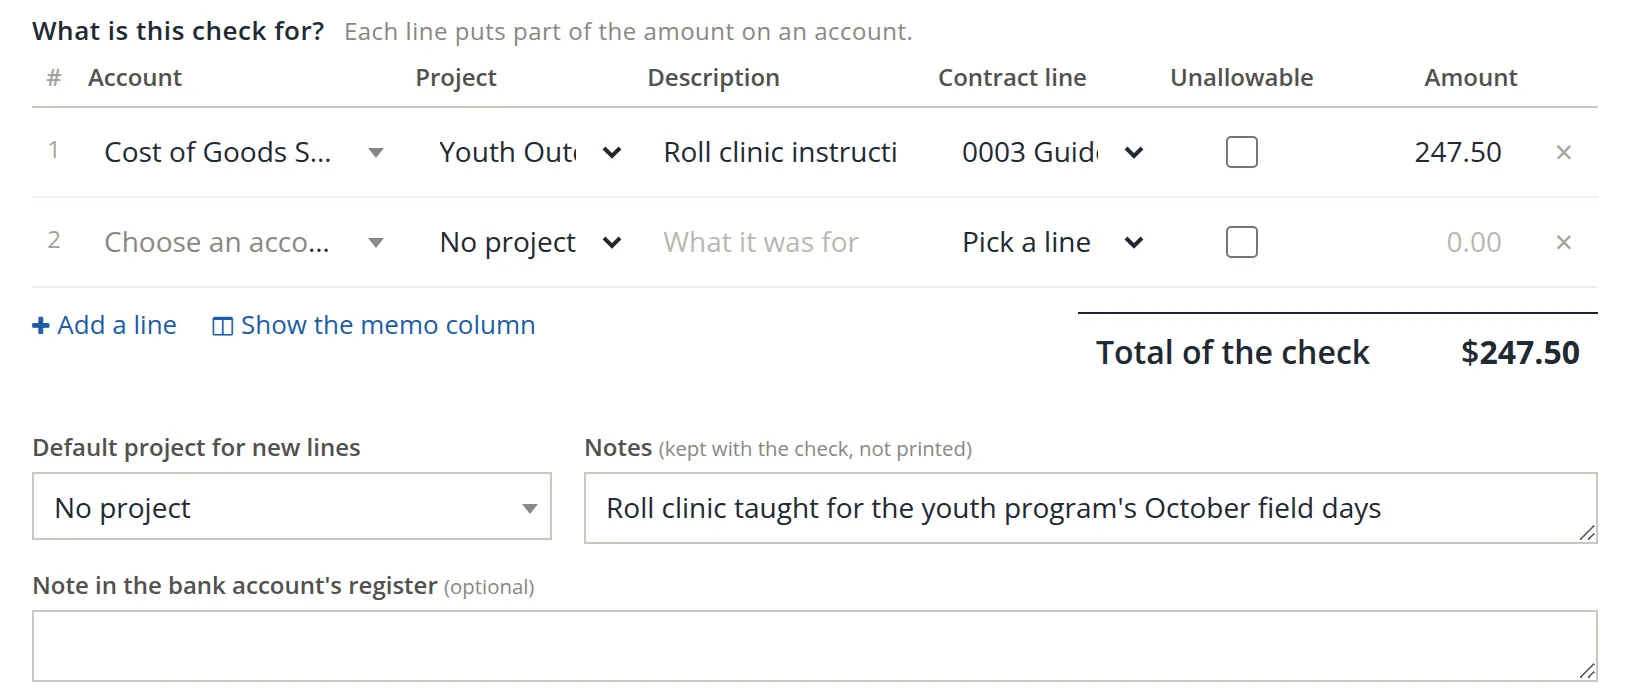
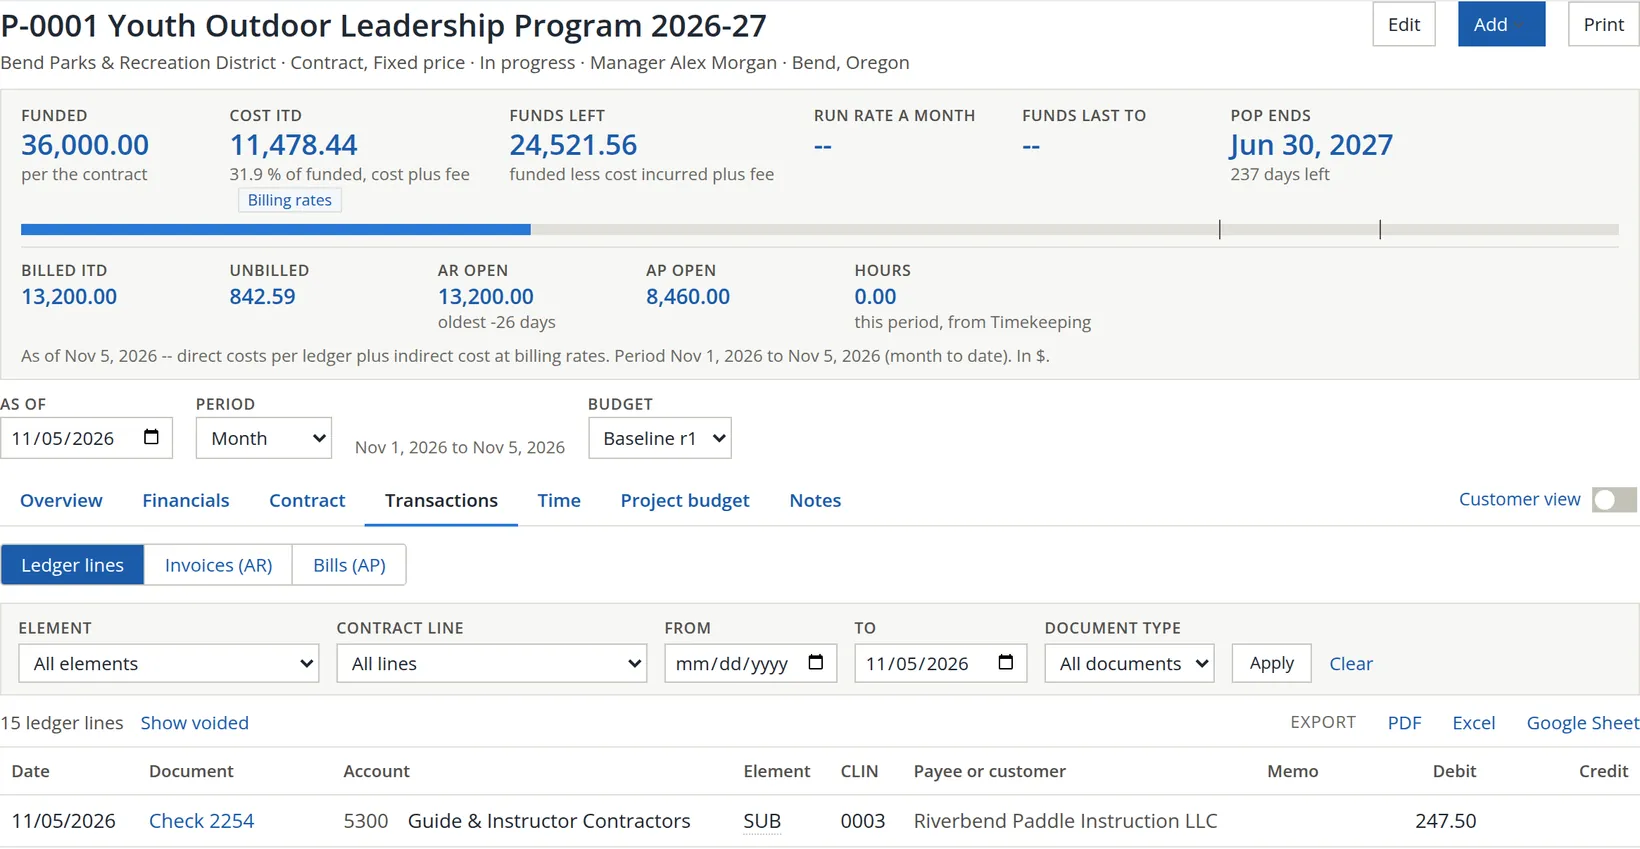
Each line has an account, a description and an amount, as in Chapter 3.1. Books that keep projects add a Project column 1, a Contract line column 2 for a project that has contract lines, and an Unallowable box 3 for a cost that may not be billed to a government contract. The instructor taught the roll clinic for the Youth Outdoor Leadership Program, so the line names that project and its contract line 0003 Guided field days. The line columns are fairly narrow. Each keeps a minimum width, so on a 1,440-pixel screen the amount and the start of every entry stay readable, but long project names, descriptions and contract lines are cut off at the edge of their boxes ("Youth Out", "Roll clinic instructi", "0003 Guid"), and so is a long account name. The whole of each is kept. A wider screen gives the account and the description more room; on a narrow one the table scrolls sideways in its own box rather than hide the amount. To read an entry in full, click into it or its picker, or open the project afterwards: its Transactions tab lists the line with its contract line (next figure). Default project for new lines 4 fills in the project of every line you add after it. Notes (kept with the check, not printed) 5 is for your own record: why the check was written, who asked for it.
- 5
Click Save, not Save and print
The check waits in the register's To print list until the run.
The Check Register
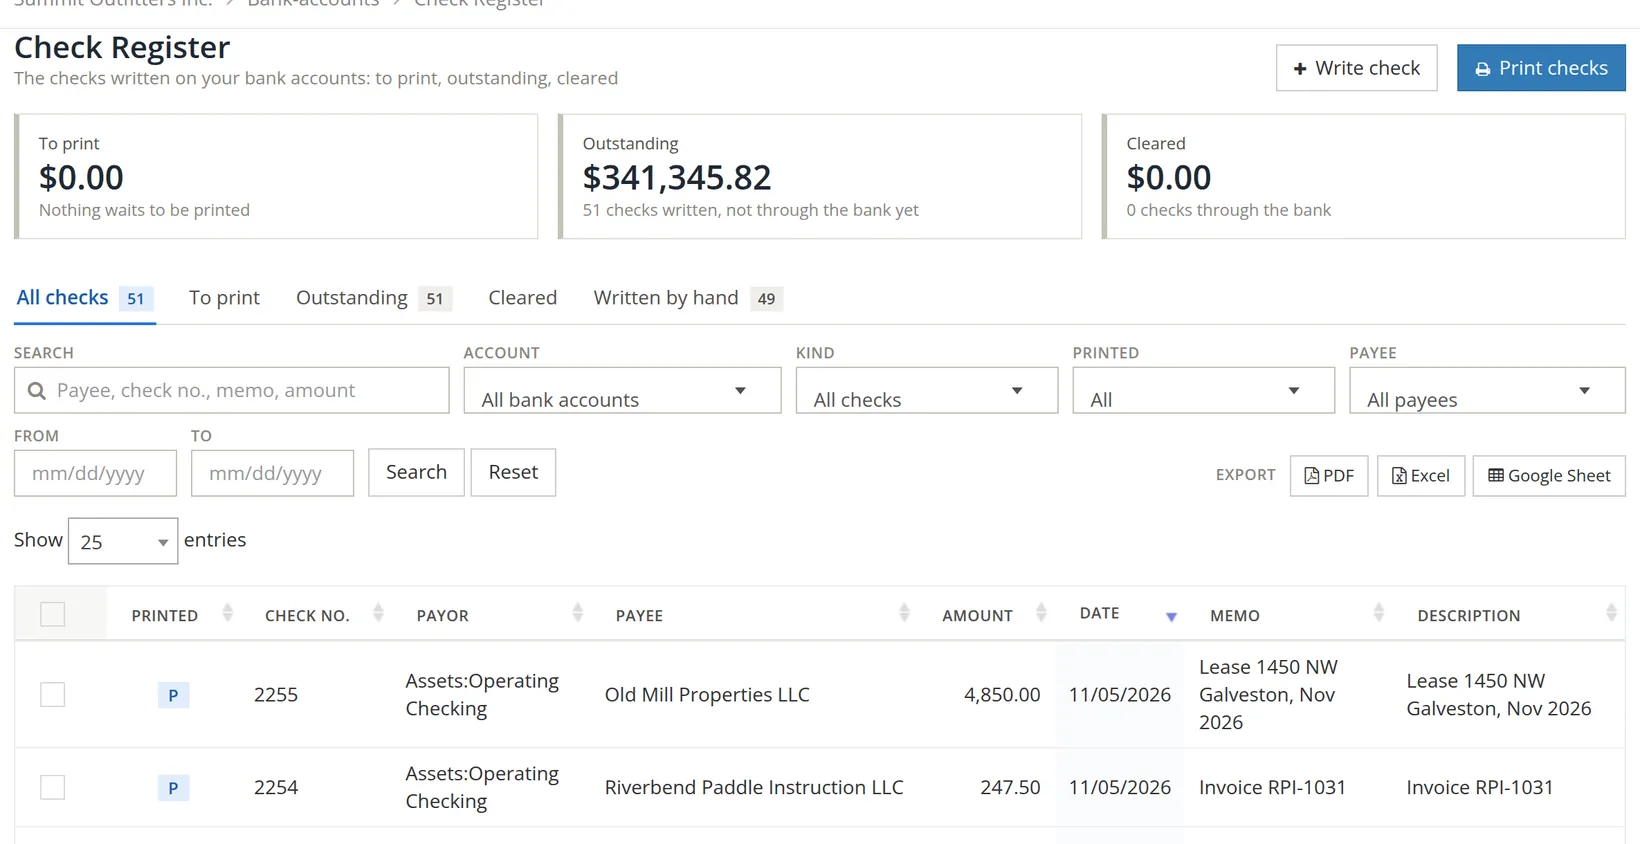
Bank Account → Check Register lists every check on every bank account. The Printed column shows each check's state:
| Mark | Meaning |
|---|---|
| N | Not printed yet: waiting for the next run. |
| P | Printed by BizBooks360. |
| H | Written by hand. |
The cards count what is To print, what is Outstanding (written but not yet through the bank) and what has Cleared (marked cleared in a reconciliation, Chapter 4.4). Above the list, filters narrow it by Account, by Kind (Banking checks or Payroll checks), by Printed state (including Printed, not cleared) and by payee.
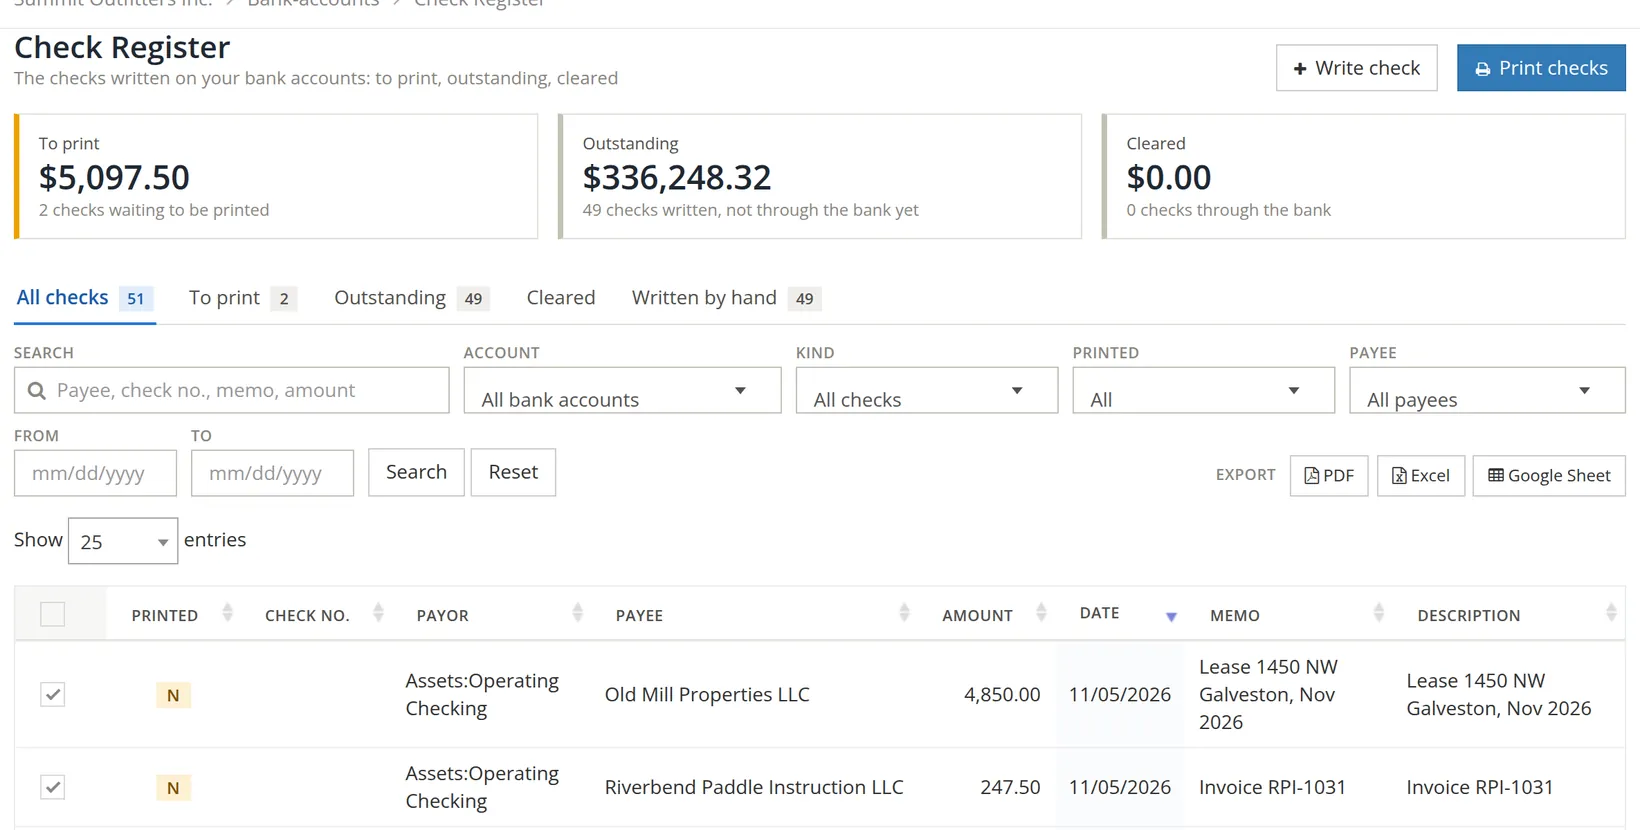
Sort Outstanding by date. A check more than 90 days old has probably been lost: call the payee before it is cashed late against a balance you thought was spare.
A company can require a second person to approve each payment: Settings → Approvals → Checks and bill payments need a second person's approval, with an amount below which no approval is needed. With the rule on, a new check is saved and posted, but its page reads "Not approved yet: it cannot be printed until a second person approves it under Accounts > Approvals". A print run that includes it is refused with "Waiting for approval: a second person must approve this payment first." Ask the approver before the run. Summit leaves the rule off.
Print the run
- 1
Load check paper, then click Print checks
The ticked checks are printed; untick any you want to hold back.
- 2
Read the summary line
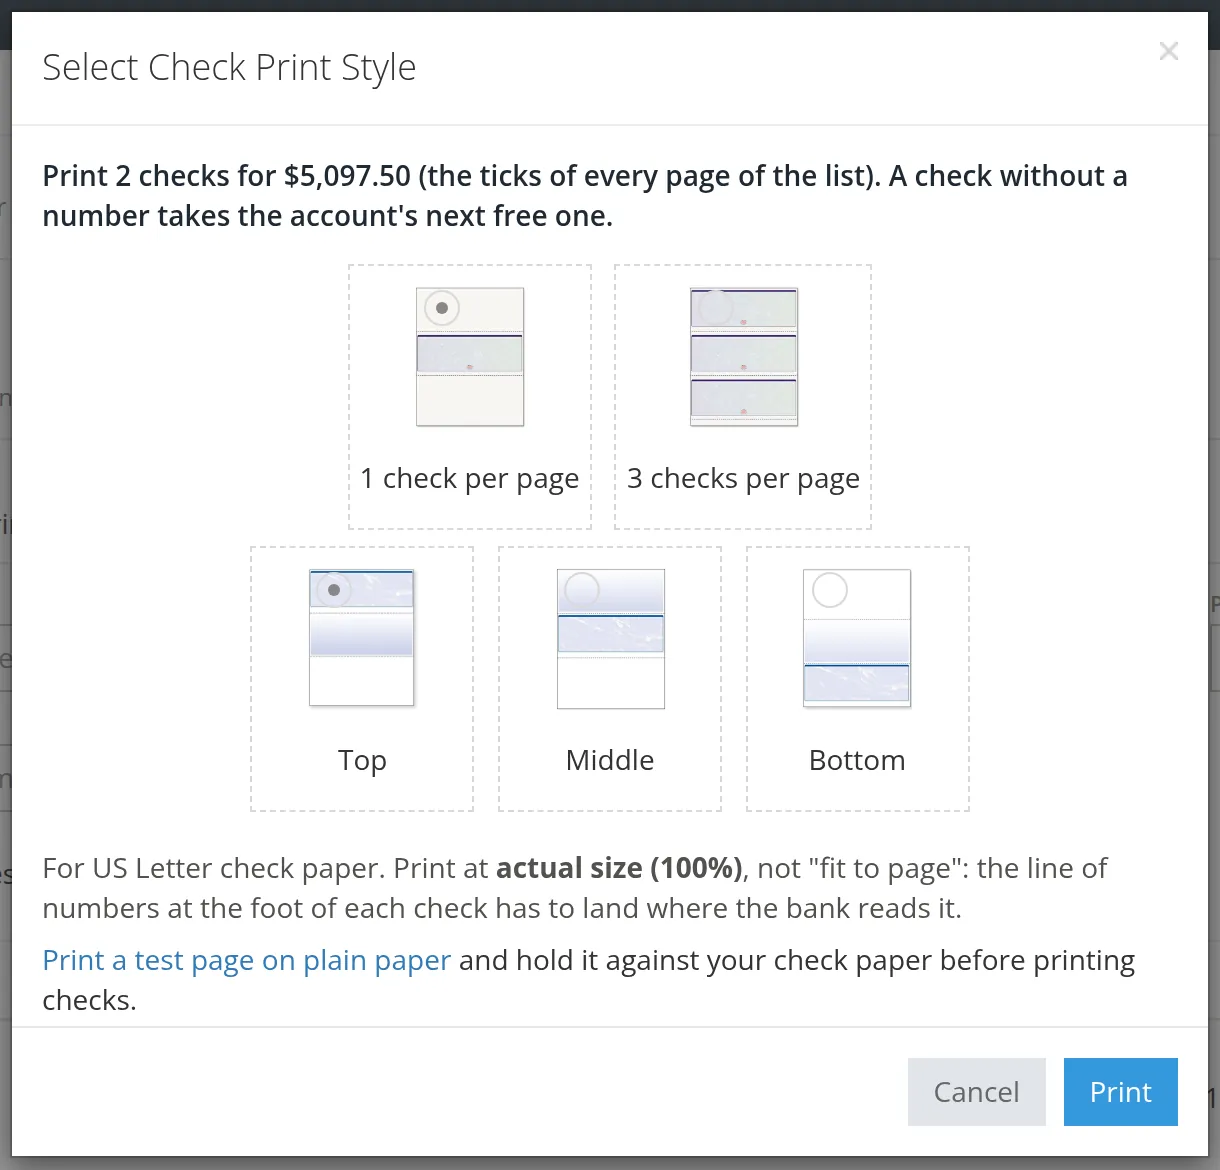
"Print 2 checks for $5,097.50": compare it with the checks you expect.
- 3
Choose the paper layout 1 and position 2
One check per page (at the top, middle or bottom) or three per page, to match your check stock.
- 4
First time? Print a test page on plain paper 3
Hold it against a sheet of check paper to the light. If the lines do not line up, fix the layout before printing real checks.
- 5
Click Print 4, and print the PDF at actual size
Each check takes the next free number. In the browser's print dialog choose actual size (100%), not "fit to page": the magnetic-ink line at the foot of each check must land where the bank's machines read it.
Check-printing practice
- Store blank check stock locked away, and count it after each run.
- A check jammed or misprinted? Open it and void it, write "VOID" across the paper copy, and keep it. Then write a fresh check for the payment.
- Sign promptly, and never pre-sign blank checks.
- Mail checks with the remittance (the invoice number in the memo) so the payee applies it correctly.
Check your understanding
1. Why leave the check number empty on a check to be printed?
Answer
So the number is given in printing order, matching the paper stock with no unexplained gaps.
2. What does an H in the Printed column mean?
Answer
The check was written by hand.
3. Why print at actual size?
Answer
So the magnetic-ink numbers at the foot of the check sit where the bank's machines read them.